Crafting a Dynamic Stripe Pricing Table: Supporting Yearly and Monthly Subscriptions
Welcome to the world of online commerce, where flexibility reigns supreme.
In the game of attracting and retaining customers, offering options is non-negotiable.
Whether it's monthly or yearly subscriptions, catering to diverse preferences is the name of the game.
In this guide, we're diving into the nitty-gritty of Remix, Tailwind CSS, and Stripe to help you craft a dynamic pricing table that leaves no room for compromise.
Get ready to amp up user experience, drive conversions, and stay ahead of the curve in the competitive landscape of online business.
Create Stripe products with prices
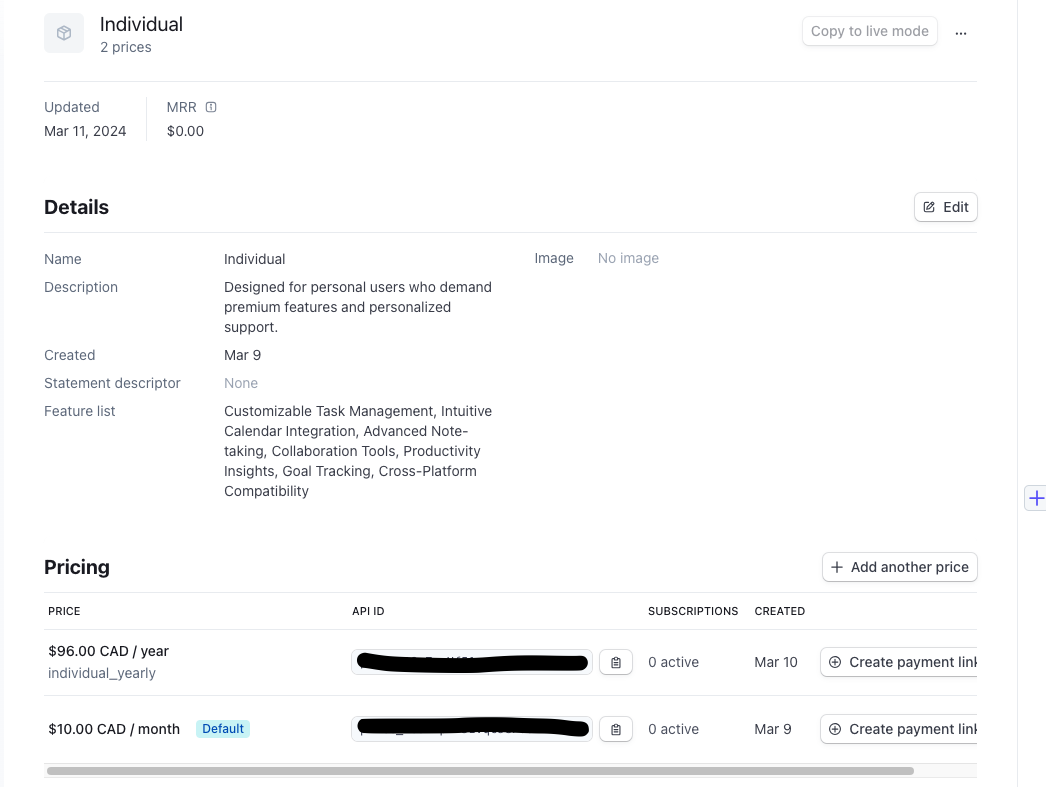
The first step to create a pricing table, is to create products in Stripe. From your Stripe account, navigate to the Product catalog page.
We'll create 3 products (Individual, Professional, Enterprise). For each product, we'll define the following properties:
- name
- description
- list of features
- monthly recurring price
- yearly recurring price
popularmetadata for the Professional product (in order to highlight it)
Here is an example of the Individual product:
Getting the products with prices from the backend
It's time to code the Remix application!
In order to get the list of products with prices, we'll create a utility function getProductsWithPrices in a new file stripe.server.ts
// stripe.server.ts;
import Stripe from "stripe";

const stripe = new Stripe(process.env.STRIPE_PRIVATE_KEY);

export const getProductsWithPrices = async () => {
  const { data: products } = await stripe.products.list({
    active: true,
    expand: ["data.default_price"],
  });

  const productWithPrices = await Promise.all(
    products.map(async (product) => {
      const { data: prices } = await stripe.prices.list({
        active: true,
        product: product.id,
      });

      return {
        ...product,
        prices,
      };
    })
  );

  const sortedProductsWithPrice = productWithPrices.sort((a, b) => {
    if (
      (a.default_price as Stripe.Price).unit_amount! <=
      (b.default_price as Stripe.Price).unit_amount!
    )
      return -1;
    else return 1;
  });

  return sortedProductsWithPrice;
};
Some things are worth noting:
- line 9: we need to expand the
default_priceattribute of the product because we want to sort the list of products by price. - line 12: getting the list of products with prices requires multiple requests: 1 request to get the list of products and 1 request for each product to get the prices.
- line 26: we sort the products form lowest to highest price, in order to display them in the UI: Individual, Professional, Enterprise.
Create a PricingTable component with Tailwind CSS
It's now time to create the the PricingTable component with Tailwind CSS and ShadcnUI:
// pricing-table.tsx
import { CheckIcon } from "lucide-react";
import { cn } from "~/lib/utils";
import { Badge } from "./ui/badge";
import { Button } from "./ui/button";

interface PricingTableProps {
  productWithPricing: {
    name: string;
    description: string | null;
    metadata: {
      [name: string]: string;
    };
    prices: {
      unit_amount: number | null;
      recurring: {
        interval: string;
      } | null;
    }[];
    features: {
      name?: string;
    }[];
  };
}

export const PricingTable = ({ productWithPricing }: PricingTableProps) => {
  const { name, description, features, metadata, prices } = productWithPricing;

  const montlyPrice = prices.find(
    (price) => price.recurring?.interval === "month"
  );
  const yearlyPrice = prices.find(
    (price) => price.recurring?.interval === "year"
  );

  const popular = metadata["popular"] === "true";

  return (
    <div className="mx-auto text-left">
      <div
        className={cn(
          "flex h-full flex-col overflow-hidden rounded-lg border",
          { "border-primary": popular }
        )}
      >
        <div className="flex flex-1 flex-col">
          <div className="px-6 py-10">
            <div className="mb-4 flex items-center justify-between ">
              <h3 className="text-2xl font-medium">{name}</h3>
              {popular && <Badge>Most popular</Badge>}
            </div>
            <h4 className="font-base mb-4 text-sm text-muted-foreground">
              {description}
            </h4>
            <div className="mb-4 flex items-end">
              <span className="flex items-start text-5xl tracking-tight">
                <span className="font-bold">
                  ${montlyPrice?.unit_amount / 100}
                </span>
              </span>
              <span className="text-xl font-medium text-muted-foreground">
                /month
              </span>
            </div>
            <div className="mb-8 flex">
              <span className="text-muted-foreground">
                ${yearlyPrice?.unit_amount / (100 * 12)} per month if paid
                annually
              </span>
            </div>

            <Button
              variant={popular ? "default" : "outline"}
              className="w-full"
            >
              Subscribe
            </Button>
          </div>

          {/* features */}
          <div className="flex flex-1 flex-col justify-between p-6">
            <ul className="space-y-4">
              {features.map((feature) => (
                <li key={feature.name} className="flex items-start">
                  <div className="flex-shrink-0">
                    <CheckIcon
                      className="text-primary-500 h-6 w-6 flex-shrink-0"
                      aria-hidden="true"
                    />
                  </div>
                  <p className="ml-3 text-sm font-normal text-muted-foreground">
                    {feature.name}
                  </p>
                </li>
              ))}
            </ul>
          </div>
        </div>
      </div>
    </div>
  );
};
If the popular metadata is set to "true", we slightly change the pricing table to:
- display a badge
- highlight the border
- highlight the subscribe button
Create page in Remix
Let's put the pieces together in Remix by creating a page in Remix:
// routes/pricing.tsx
import { json } from "@remix-run/node";
import { useLoaderData } from "@remix-run/react";
import { PricingTable } from "~/components/pricing-table";
import { getProductsWithPrices } from "~/services/stripe.server";

export const loader = async () => {
  const productsWithPrices = await getProductsWithPrices();
  return json({ productsWithPrices });
};

export default function PricingPage() {
  const { productsWithPrices } = useLoaderData<typeof loader>();
  return (
    <div className="p-8 text-center">
      <h1 className="mb-10 scroll-m-20 text-2xl font-extrabold lg:text-5xl">
        Pricing
      </h1>

      <div className="flex flex-col space-x-0 space-y-6 md:flex-row md:space-x-6 md:space-y-0">
        {productsWithPrices.map((product) => (
          <div key={product.id} className="flex-1">
            <PricingTable productWithPricing={product} />
          </div>
        ))}
      </div>
    </div>
  );
}
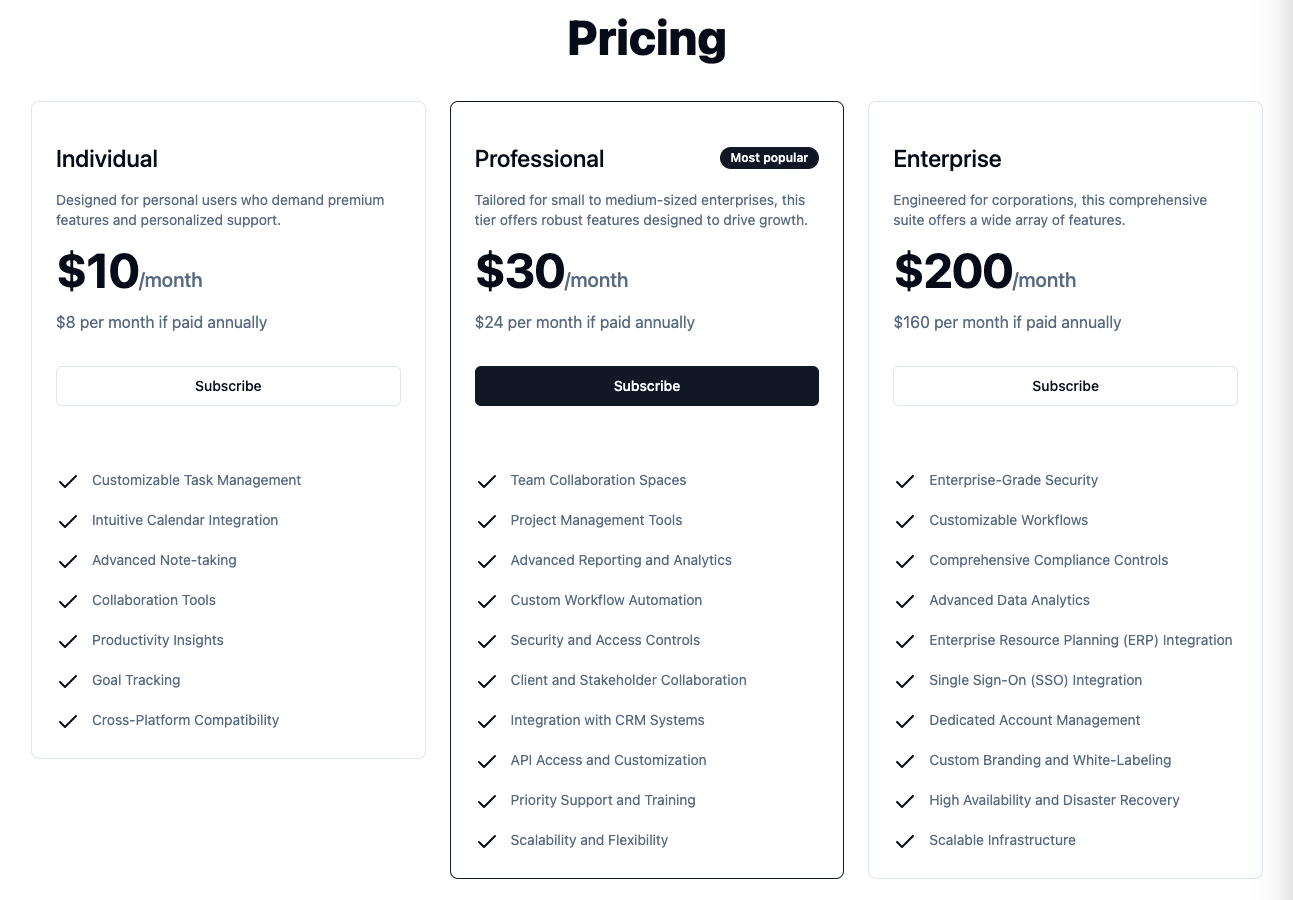
With that in place, here is what the pricing tables look like:
Conclusion
In the realm of online commerce, adaptability is everything.
By harnessing the power of Remix, Tailwind CSS, and Stripe, you've armed yourself with the tools to create a pricing table that's both functional and visually appealing.
With options for both monthly and yearly subscriptions, you're not just meeting customer expectations – you're surpassing them.
So roll up your sleeves, dive into the details, and watch your business thrive in the dynamic world of online commerce.
Cheers to flexibility and success!
Code for this article is available here: https://github.com/benoitpaul/stripe-labs/tree/main/product-prices